Jump to content
00s-dime00

Joe's wall build

Recommended Posts

Hello everyone. I have been a lurker for a while, and decided to present to you my build log...I hope you enjoy :D

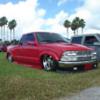
The truck

DSC02221.jpg

The equipment list:

For subs, 4 fully loaded 15" FI BTL's

DSC02209.jpg

DSC02208.jpg

For Amplification, I have a RF T8004

DSC02236.jpg

And a RF T4001..for now..the other one will be on its way shortly

DSC02161.jpg

Edited by 00s-dime00

Share this post


Link to post
Share on other sites

To back the amplifiers, I have 6 Odyssey PC2150 batterys and an Excessive Amperage 300 amp alt

(one battery is missing from this pic)

DSC02168.jpg

DSC02240.jpg

My head unit is an Alpine IVA-W200

DSC02158.jpg

Knukonceptz wiring

DSC02131.jpg

Share this post


Link to post
Share on other sites

Where to start....well, here's the radio part

I cut out the 1.5 DIN opening, glued the trim ring and put a rough coat of filler on.

DSC02166.jpg

Sanded down and threw on 2 coats of slick sand

DSC02170.jpg

Sanded that down and did a test fit before urethane primer and basecoat/clearcoat

DSC02173.jpg

DSC02175.jpg

Urethane primer sprayed, wet sanded, and basecoat/clearcoat applied.

DSC02176.jpg

DSC02178.jpg

Share this post


Link to post
Share on other sites

My previous system had a blowthrough. I filled that in with some 16ga sheet.

DSC01951.jpg

Trimmed up some of the excess stock sheet metal inside and seam sealed it

DSC02230.jpg

Share this post


Link to post
Share on other sites

I added some smaller braces inside and started on the floor

DSC02235.jpg

Some more floor in

DSC02238.jpg

DSC02237.jpg

I added a piece of plywood over the brace, and filled the cavity between that and the sheet metal with expanding foam. The back wall should be pretty stout now.

DSC02239.jpg

Share this post


Link to post
Share on other sites

If you're wondering what type of wood I am using, It is baltic birch.

DSC02234.jpg

DSC02233.jpg

And that is where I stand at the moment. Enjoy

Share this post


Link to post
Share on other sites

Wow thats a lot of work, keep the pictures coming. ;)

Share this post


Link to post
Share on other sites

It's been fun to say the least.. :dammit: ..Speaking of pics.... :OhYeah:

I got the back wall cut to fit

DSC02241.jpg

DSC02242.jpg

Share this post


Link to post
Share on other sites

Amps down the side behind plexi so they are shown when the rear doors are open?

Another thought...use the lead for the dome light on a relay to light up said amps when the doors are open.

I wish I had that kind of room to work with...jealous, really I am.

Share this post


Link to post
Share on other sites
I like what the window says in your first picture.

You dirty, dirty girl!

Share this post


Link to post
Share on other sites

looking good! wondering why you just tacked the brace to the sheet metal? personally, i'd run small beads, at least 2", where there's a tack. way stronger. unless i missed something...

nonetheless, looking forward to seeing this one completed!

wheeeeeeeeeeeeeeeeeeeeeeeeeeeeeeeeeeeeeeeeeeeeeeeeeeeeeeeeeeeeeeeee :slayer:

Share this post


Link to post
Share on other sites

cool truck. I likes it.

Share this post


Link to post
Share on other sites

Thanks every one. :thanx:

To answer some questions;

WoW. That looks like a lot of work. Why are you using BB instead of MDF?

BB is lighter and stronger than MDF....That, and the sawdust from it won't make me sneeze uncontrollably for the next week. :lol:

looking good! wondering why you just tacked the brace to the sheet metal? personally, i'd run small beads, at least 2", where there's a tack. way stronger. unless i missed something...

nonetheless, looking forward to seeing this one completed!

wheeeeeeeeeeeeeeeeeeeeeeeeeeeeeeeeeeeeeeeeeeeeeeeeeeeeeeeeeeeeeeeee :slayer:

Yes, I Did add a few beads to it on the inside. Also,the brace was plug welded to the sheet metal from the outside.

More pics in a little bit.

Share this post


Link to post
Share on other sites
looking good! wondering why you just tacked the brace to the sheet metal? personally, i'd run small beads, at least 2", where there's a tack. way stronger. unless i missed something...

nonetheless, looking forward to seeing this one completed!

wheeeeeeeeeeeeeeeeeeeeeeeeeeeeeeeeeeeeeeeeeeeeeeeeeeeeeeeeeeeeeeeee :slayer:

Yes, I Did add a few beads to it on the inside. Also,the brace was plug welded to the sheet metal from the outside.

More pics in a little bit.

yep, i missed something, lol. glad to know. i was just imagining all those tacks breaking from the pressure and the ungodly rattling that would follow.

wheeeeeeeeeeeeeeeeeeeeeeeeeeeeeeeeeeeeeeeeeeeeeeeeeeeeeeeeeeeeeeeeeeeeeeeeee :slayer:

Share this post


Link to post
Share on other sites
lookin good man!

Thanks man.

Here's a lil update;

The baffle is made and the holes routered out

DSC02246.jpg

I threw in the three that I had sitting around for sh1ts and giggles...The fourth is in my daily driver on a T2001 for right now.

DSC02247.jpg

DSC02248.jpg

DSC02252.jpg

I knocked off a little bit of the drivers side headrest so I can get the full effect of the port...lol

The passenger side will get the same treatment.

Share this post


Link to post
Share on other sites

Thats going to hurt!

Share this post


Link to post
Share on other sites

Create an account or sign in to comment

You need to be a member in order to leave a comment

Create an account

Sign up for a new account in our community. It's easy!

Register a new account

Sign in

Already have an account? Sign in here.

Sign In Now

×