Jump to content
bamaboy

* Summer 09' Rebuild *

Recommended Posts

Figured i would go ahead and start a new build log

Ive been on here for a while just never posted here much, most of my time is wasted on CA.com, gonna start wasting some more time here now also

just gonna copy some stuff over, so some things might not make too much sense

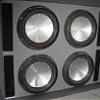
Pulling out the 4 15s, putting in 4 12s in a smaller box, Vehicle is my 04 Explorer

Setup will consist of

Kenwood DDX812

Rockford 3Sixty.2

RF T6004

RF T4002

RF T40001bd

4x DC Audio LVL 4 12s

Hertz MLK2 running Active

old setup was same, just with 4 15" RF T2s in a 16cu ft wall, which was an awesome build, i just decided walls arnt my thing, want to step to somethign smaller

Also the reason i have all RF, Hertz, Kenwood etc is because i work at a shop that sells it all and got a hella deal on everything, but i will be changing colleges soon and moving away so rebuild will be coming along

Some pics of the Tear down

img1465a.jpg

img1478b.jpg

img1479x.jpg

img1549d.jpg

img1551e.jpg

img1553z.jpg

img1555k.jpg

Share this post


Link to post
Share on other sites

some filler pics from the old setup :D

amp5.jpg

BTL 18s vs RF T2...

img1413lz5.jpg

img1429mt8.jpg

img1449ie9.jpg

Tweeter pods for Hertz ML280/MLK2 tweet

img1522zk7.jpg

img1523kt3.jpg

img1525mz4.jpg

img1530ht9.jpg

img1531ia4.jpg

img1537sv2.jpg

img1541xq4.jpg

img1542ee3.jpg

img1547jm3.jpg

img1553wa8.jpg

img1554wq5.jpg

Share this post


Link to post
Share on other sites

4x DC Audio LVL 4 12" D2, Red dustcaps, Thanks Rusty, Cant wait to get these hooked up, Subs got here with no problems and look excellent

This is the first time ive messed with 12s in my vehicle in probably 4 years, wanted to go back with something smaller than 18s and such

on to pics

img1556b.jpg

img1565y.jpg

img1569a.jpg

img1570b.jpg

img1574ylq.jpg

img1575f.jpg

img1579d.jpg

img1580m.jpg

Share this post


Link to post
Share on other sites

Brace thats gonna hold the ports

0513091546a.jpg

Little update, worked on it a bit last week, got all the holes cut out for everything, pain in the ass even with having my jasper jig

some updated pics

image00002i.jpg

image00004b.jpg

image00005a.jpg

image00006z.jpg

image00007j.jpg

image00009m.jpg

dont worry about the tabs on the top piece holes, its how we do the jasper jig to jeep it from moving, just leave 2 tabs on opposite sides to keep the center hole from moving and when your done you can break it off and cut away the tabs

image00010m.jpg

image00014.jpg

and did a new startup screen on my kenwood unit, this is what it shows everytime you turn it on, a little Photoshop work on a DC image and done

img1637w.jpg

also have my plexi piece cut, taking it tomorrow to get it laser etched with 2 DC LOGOs

inside of the box will be done in gray fleckstone paint with DC logo in red

outside hasnt been decided on yet, probably multi colored textured black

Also Specs on the box:

8 cu ft net with 3 6" Aeros, gonna have dual tuning, with all 3 ports open it will be 37.5hz, with 1 port plugged tuning will drop to 30.5hz, already have a local place cutting the port plug for me, should have it tomorrow

Share this post


Link to post
Share on other sites

img1877g.jpg

Quick paint

img1881y.jpg

the front piece cutout for plexi and the mounting piece, plexi is at the place now getting done

img1883opz.jpg

img1651r.jpg

color going on the inside of the box, grey fleckstone piant

img1652k.jpg

the new floor

img1887s.jpg

everything packed up

img1889.jpg

best paintjob evar if i have to say so myself :)

Like i said, Plexi is is being done now, i had the foam cylinder done to seal one port off, 6 1/4x12", i picked it up the other day, so i just need to hurry up and get done

Share this post


Link to post
Share on other sites

mounted the back brace, painted it and also repainted some other spots, and did a first layer of the fleckstone paint for the inside, I fixed the light spots but didnt get pics of it after the respray, but you wont be able to see the difference with everything done

img1701w.jpg

img1702.jpg

img1704n.jpg

img1710v.jpg

after some drying...pull the tape off...tada

still have to paint the rest of the DC red

Share this post


Link to post
Share on other sites

Okay, been really busy this summer with working at the shop and classes this summer, i havnt been really stressing out over this build, just doing some stuff here and there when i get free time, well pretty much done now, just need to hook up the amp and subs, i just moved to a different college and got a new apartment so just got done with that and needed the room in the back to haul, left the job at the shop so i had/have a little bit of free time to get down on this junk

onto a month of work in a few pics, nothing too exciting, just a bunch of time consuming stuff, bondo, sanding, more bondo, more sanding etc

these are posted from another forum so somethings may be wierd

pics:

img1711m.jpg

img1713i.jpg

img1715p.jpg

img1717u.jpg

img1718cjb.jpg

Share this post


Link to post
Share on other sites

img1887s.jpg

img1758b.jpg

img1909okj.jpg

img1910g.jpg

img1911dyb.jpg

img1914c.jpg

i switching back and forth between 2 cameras, i didnt want to get my slr dirty on some of this stuff so they might be out of order

Share this post


Link to post
Share on other sites

a few layers of primer, then the texture paint, painted a few different samples, finally settled on the dark gray primer vs black, red, light gray and some others

that texture paint i used on the outside was a bish, showed streaks bad, ill admit im not the best painter but i hated using it, the texture i used on the inside was super easy, these are before i went and bought more cans to fill in the gaps

img1915j.jpg

img1917a.jpg

img1919o.jpg

img1920j.jpg

img1921o.jpg

img1923f.jpg

Share this post


Link to post
Share on other sites

img1933b.jpg

img1936u.jpg

img1939t.jpg

port plug i had custom cut locally at a foam place, didnt find any 6" ones online, we do some business with the people and i got it cheap, like 2-3$, gonna have 32hz and 38hz tuning

img1762e.jpg

got it looking secsy with some paint...mmmm

img1768u.jpg

Share this post


Link to post
Share on other sites

security screws to mount everything

IMG_1846.jpg

terminal and led power

IMG_1847.jpg

IMG_1851.jpg

ghetto battery holder

IMG_1853.jpg

amp board...what happens when you dont have long enough wood

IMG_1854.jpg

IMG_1857.jpg

Share this post


Link to post
Share on other sites

looks sweet, can't wait to see some vids of this bad boy.

Edited by SPLScion

Share this post


Link to post
Share on other sites

I love the port plug.

Share this post


Link to post
Share on other sites

Very nice! :)

X2 :fing34:

Share this post


Link to post
Share on other sites

This box is sooooooooo sick !!!!

I love the port plug too.

This is not a box made to be hide, is it?!!!

Share this post


Link to post
Share on other sites

Create an account or sign in to comment

You need to be a member in order to leave a comment

Create an account

Sign up for a new account in our community. It's easy!

Register a new account

Sign in

Already have an account? Sign in here.

Sign In Now

×