-
Content Count
17,871 -
Joined
-
Last visited
-
Days Won
40
Content Type
Profiles
Forums
Gallery
Everything posted by Adrian_D
-
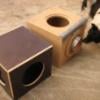
simplest rack i could come up with : there are 3 holes in the side panels : 2 in front, for cooling and 1 in the back, for the wires built it in one afternoon.
-
http://www.zipzoomfly.com/jsp/ProductDetai...rodlist=froogle that must be it. AV710.
-
never had trouble with all the grease from when i worked on the excavator. i used some "soap" mercedes has in their assembly line. it's not very liquid-y and has some small particles on it. works like magic
-
google-ing right now this doesn't look good
-
that's how i'll do it then. thanks btw, ever put a scope on your 9813 ? just wondering where yours starts to clip how about orientating the mids ? they will be placed in the door because i have a manual and big feet
-
trying out the head unit and my new scope : 35 out of 35, 1kHz and 10kHz (don't ask which is which, i can't remember). is it me or it's not clipping ? felt kinda weird to not see something obvious when i went past 30
-
thanks Casey updates : got tight cleareance ? door panel and stock speaker removed. i thought about mounting the tweeters and came up with 2 places : any ideas as to which place i should go for ? other placement ideas ? the gallery has become very annoying. i'm uploading one pic and on the second one i get this error : IPB WARNING [2] Division by zero (Line: 1477 of /modules/gallery/lib/gallery_library.php)
-
rear fill + front stage = mid-stage. tried it in the jeep a few days ago
-
i really need to get a better soundcard. put the scope on mine today and it looked like total crap above 4kHz. even with all the volumes all the way down. i guess that's why the tweeters seem a bit bright the 9813 on the other hand looked quite nice
-
once again, living in europe sucks
-
i want a jeep cj7. that is all
-
the parts of the seat that move while adjusting go down low enough to touch the amps, scratching them. so i decided to glue some strips of seatbelt material to retain some adjustability and protect the paint mostly done with wiring and such (i still need to run 1/0 from the battery to the distro. i'm going to ground the amps on the bolt you can see sticking out from the floor. in case some of you are wondering, the car is (and always was) black. there were some small rust spots on the floor, just where the bolts go and i had to fix things up. the primer is red. overall i'm pleased with the state of the floor, considering it's age
-
posted a tiny bit of update in the build log
-
turns out that crap deadening was not stock and was glued over bolts and plugs. i removed as much as i could. finished deadening the floor today. only 1 layer though. i doubled it up where the metal sounded really hollow. driver's side here you can see some of the crap deadening that was reluctant to get off the metal. passenger side firewall. i decided to go with small strips because i had trouble keeping the carpet out of the way so i had to apply the mat one-handed one of the treasures hidden under the old mat
-
listening to music with the window open = crickets in the background. i kinda enjoy this
-
i'll give it six stars
-
is it me or the steering is kinda whimpy for such big tires ? maybe i looked at too many drag link conversions for xj's
-
i never thought deadening can be so painful for the back
-
i wish you luck Sean
-
look at the first reply


