Leaderboard


Popular Content
Showing content with the highest reputation on 02/10/2011 in all areas
-
1 pointwow... anyone taking part in trying to make this bill happen are victums of insestic breading or they were dropped on their heads really fuckin hard when they were kids........ people this stupid should be flipping burgers not passing bills
-
1 pointThey are trying to ban car alarms? Sounds like this guy just doesn't like sound.
-
1 point
-
1 pointThank you Phi I've watched Ip Man 1 & 2, crazy ass movies Inception is ridiculously awesome Unstoppable pretty damn cool man more movies!
-
1 pointDon't sweat it! Thanks for the movies Now I can go home and not be bored 8D
-
1 pointGot started on the top front again today. One side tacked on. I did some plug welds to tie the plate into the donut underneath and to the crossmember where it meets the coil pocket. Also added the inside trim piece to clean up the looks and give it the radiused corner. Still needs a little trim work but it's close. Finished the last filler piece on the right frame horn. Don't mind the nasty paint and rust. I cleaned the weld area. The entire frame is getting blasted when I'm done with it anyways. Plated the other top side rail Then made the filler pieces. I still need to do a bit more where the steering shaft recess is thats why the plates don't line up. I'll get that after plating the top of the crossmember.
-
1 pointJust about got the rest of the bodymount openings cut out and sleeved. I'll get the last 2 tomorrow then trim and flush them all. Plated the front of the crossmember but still need to trim the top edge once I flip it. I got the lower edge real close to it's final shape. I pinched the nose down a bit more to be sure it won't bottom out. Flipped the frame and finished trimming the crossmember plate. Then got started on the top arch plate. Making sure to keep it tight with minimal gaps. Got the other arch plated and trimmed the rear section down. Still need to cap the top of the rear cross bar. Almost done plating the rear. I have a couple small filler pieces and I'll have to get the very back piece done after I take it off the table.
-
1 pointThanks guys. I've been tied up lately but managed to get a bit done. Like I said before I'm going to use as little filler as possible so it's my goal to get all the corners nice and square to allow me to shape the steel instead. Plated the bottom of the crossmember but still need to trim the front edge after I flip it back over. Everything still needs more metal finishing but thats for a later date. Went ahead and sleeved some of the body mounts for a change of pace. Working on a cap/plug to keep things smooth. I may have a simple and cost effective methode figured out. Started getting the bottom arch plated tonight. Got the other arch bottom tacked on. I'll be working on the rear piece tonight to tie everything together. Laid down a nice fat bead into the bevell for good penetration and to get the bead high enough to allow me to polish it down nice and flat without doing multiple passes. Got the back piece done tonight.
-
1 pointThanks guys. I'm changing my plans a bit for the suspension. Not going the round tube route, going to hand fab everything from plate steel. More progress. Other side is all tacked in place and almost finished. Here is a pic of how the bolt will be flush mounted. Also rounded the corners off a bit more to help the bottom flow nicer into the mount pocket.
-
1 pointDid a little more work on the mounts today. I want to keep as much of the fasteners hidden as possible for a cleaner look. I'll be dressing up the other side of the bracket as well. Got the other half of the mount just about finished. I need to build up some low spots with weld and do a final polish still. The head of the bolt will be counter sunk now. The front mount is taking shape. Everything still needs a bit of metal finishing but it's close. I had to take a break from the brackets so I went ahead with plating the under side of the frame horn before moving to the other side. I'm real pleased with how smooth it's starting to look.
-
1 pointYes it will. Thanks. I've been welding for almost 20 years now so I've had a bit of practice. The bottom of the frame hangs down lower on the stock frame at the firewall. The mods I've done will now make the lower edge of the frame thats visible even with the rocker instead of hanging lower up front. Decided I didn't like how this section was looking so out came the cut off wheel. Then I made up some new mount flanges out of 1/4" plate and made a 1/2" thick slug to give the bolt opening more surface area so the hole won't oval out. It is welded to the top of the crossmember now to eliminate the void behind it like the factory mount has. This also allowed me to tie into the "I" beam plate. I should also be able to tie the new mounting flange into the coil pocket sleeve now. Made a new curved section out of 3/16" to replace the factory section I cut out. Also got the rear of the crossmember plated but it still needs final trimming. Notice the radiused corner where the crossmember meets the side rail, there will be very few corners if all goes to plan. Got the other mount done and moved onto plating the bottom. Here's one of the mistakes I spoke of earlier. I didn't get the corner piece lined up properly and it was not coming back off by the time I noticed. Not a big deal though. I just cut a filler piece to take up the gap and bevelled it like a but joint. This is a far better option that just filling the void with weld. Also dropped the coil pocket sleeve in and welded it up. I was able to tie it into the midplate as well. A little sneal peak of how it's going to look once I get everything plated, trimmed, and polished down. It going to be super clean. Dam my garage is a wreck. Plated the other side and started working on the other lower control arm bracket. Used the jig to get everything lined up and then welded it up. I still have some more to do to make them stronger and better looking.
-
1 pointWelded a washer and nut to the frame to make a captive fastener that can be plated over. Also made some over sized reinforment washers to prevent the frame from cracking. Made a mid plate for the crossmember using 1/4" plate.. It slides through the bottom and out the top creating an I beam of sorts. It will be welded on both sides and the reinforcment plates will get plug welded to it also for maximum strength. Decided I didn't like how this section was looking so out came the cut off wheel. Then I made up some new mount flanges out of 1/4" plate and made a 1/2" thick slug to give the bolt opening more surface area so the hole won't oval out. It is welded to the top of the crossmember now to eliminate the void behind it like the factory mount has. This also allowed me to tie into the "I" beam plate. I should also be able to tie the new mounting flange into the coil pocket sleeve now. Made a new curved section out of 3/16" to replace the factory section I cut out. Also got the rear of the crossmember plated but it still needs final trimming. Notice the radiused corner where the crossmember meets the side rail, there will be very few hard corners if all goes to plan. Got the other mount done and moved onto plating the bottom. Here's one of the mistakes I spoke of earlier. I didn't get the corner piece lined up properly and it was not coming back off by the time I noticed. Not a big deal though. I just cut a filler piece to take up the gap and bevelled it like a but joint. This is a far better option that just filling the void with weld. Also dropped the coil pocket sleeve in and welded it up. I was able to tie it into the midplate as well. A little sneal peak of how it's going to look once I get everything plated, trimmed, and polished down. It going to be super clean. Dam my garage is a wreck.
-
1 pointIt surpised me a bit but I had a hat and hoodie on so the sound was muffled a bit. It would have been way worse if it was summer time and I was working in a T shirt. Got the other inside plated. Started plating the top rail. All the plates meet edge to edge to create an outside corner. The goal is to leave no gap or as little gap as possible. This gives the best weld for polishing down to a rounded edge without grinding all the weld away. Just stitched welded for now until I get the rest of the plates done. Finished the other side top plate. I didn't point out that all the body mounts opeingns are being cut to allow the bushing to sit on the reinforcing plates to prevent them from sagging in over time. I added the plate to tie the rear arch plates together for a cleaner look. I still need to finish shaping it though. Got the bottom edge trimmed up and tacked in place. Also trimmed all the lower edge of the arches down and blended them into the rear bar. You can see in this pic that I've left the plates over sized towards the rear. That will be the new shape of the frame since I don't like the shape of the factory tail section. The factory shape of the middle of the arch pinches in at the bottom. I'll be reshaping that area also. The new plate is close to the new shape in this pic and will give me a much stronger and cleaner arch section when finished. I was on a roll so I just moved on to the front frame horns and trimmed those down also.
-
1 pointThanks. I'd guess that when it's all said it will weight about 2,000lbs more. It has a 5.7 V8 which is ample for driving low and slow. Thanks and I will.... Did some more work on the coil pockets today. I cut the opening out to accept a donut and then welded it in nice and square. I also went over the factory welds after welding them in. Set the cylinders up to check to make sure everything was nice and square both front to back and side to side. Now I can move forward with plating the top and I'll know where to bore the hole from underneath for the cylinder. It's starting to come together now.Plated some of the front frame horns. No heat was used on this plate. I'm eliminating the little dip in the frame on the passenger side rail. It isn't needed and looks like shit. It will be made to match the drivers side now. Drivers side required a little heat in one are to get it to lay down right. I was also able to get one side of the center section plated today. All the plates still need the lower edge trimmed flush to the frame though. Getting it to lay in these compound curves was not fun but it's worth it for the end result. No more ugly step in the frame anymore. I'm about due to order more steel already. I've used 10' of 6"x3/16" flat bar a 2'x8' half sheet of 3/16" and dam near used a full 5'x10' sheet of 3/16".
-
1 pointGot the other outer rail plated. 45ed and bevelled the weld joint same as the others. To make sure both side were as close to identical in shape as possible I trimmed my original template to match the first plate after it was trimmed to its final shape. Then I just flipped it over and clamped it to the other side and traced it out and did the final trimming. After seeing how nice and swoopy the frame is starting to look I couldn't leave this pointed nose on her. So I cut it off and reshaped it.
-
1 pointGot back at it and finished fitting the inner arches tonight. This is why I make oversized plates and final trim them after the are welded on. Now I know that the top plates will touch the side plates with no gaps due to poor plate alignment. Slow day today just messed around doing a little more cosmetic surgery. Now you see the ugly hump... Now you don't... Also tackled the last gap left from the belly pinch. Finished reshaping the other coil pocket then got started on plating the outer rails up front. No heat was used at all to form this piece. It extends all the way to the bumper mount also. Well that brings everbody up to speed on this build.
-
1 pointStarted working on the front coil pockets. First step was to find the true center of the coil pocket. I used a top cup for a coilover set up and a length of DOM tube to locate it in the coil opening then squared up the tubing and made some reference marks. Laid out my cut line and had at it. I also removed the ugly hump. I'll make a straight edge out of it when plating the outside frame rail. This is a pic of the passenger side since I forgot to get the before pic of the drivers. Made a sleeve for the coil pocket to give it a clean look. I'll be doing this the same way I do the body mount openings. I'll be able to tie it into the stock frame for a bit more strength also. No more ugly ass opening, just a perfect circle. This will also prevent any chance of a coil hanging up on the stock lip. It will be trimmed flush after all the plating is completed. I got back out there and finished the other pocket. Like I said they will get trimmed down later. Managed to get the bottom of the rear arches ground down. I'll be reshaping the rear frame horns also and deleting the bumper shocks as well. The plate is trimmed to the new shape. Now to get some sleep and do it all again tomorrow. :burn: I got started on the inner arches and tail end today. Started with adding a 2"x2"x3/16" tube to the factory brace. All the joints were coped and bevelled for a tight fit. I changed the shape of the frame to make things flow nicer. The top plates will meet up with the side plate to box in the gap left by the new shape. After spending way too long on that piece I made a plate bender up for doing the other side. I just clamp it to the table slide the plate in and lift the plate until I get the curve needed. This will save me so time on the other plates.
-
1 pointDidn't get a lot more done due to my garage needing a major cleaning. I did manage to make the new jig for relocating the upper A arm mounts. Started by welding a sleeve to the factory ear to set the center line. The threaded rod slides through it for holding the joints. Once I had everything located I made the jig and removed the factory ears and tossed them in the scrap pile. The arms will not be using a cross bar anymore. They will have a double shear style bracket and camber/caster will be set using the threaded joints. No more hokey ass shims. Trimmed the top edge flush on both side rails. Cut the arch plates and got both outside sections welded on. They still need final trimming. As I always try to do, the arch and side rail meet at a 45 and both pieces are bevelled for good penetration and joint strength. I also make sure the plates touch. Then I had a battery explode on my powered C clamp. Sounded like a dam bomb went off. I was standing about 2 feet away, luckily with my back turned to it. It was my own dumb fault. I had the batteries charging and was grinding to close to them without covering them. Won't make that mistake again. :wow: I added an extra piece of 1/8" plate that extends beyond the seam of the inside plate another 4". This area is the most stressed by the weight of the set up thats why I added this extra strip. I'll get the other side tomorrow then trim everything up. Welded on the other plate. The 1/8" plate I'm using was painted at one point if anybody was wondering why I have all these different colored sections. I just grind the paint from where I'm welding. It's all getting covered by fresh 3/16" plate so I'm not concerned about how it looks. Trimmed the top edge of the arches. Then flipped the frame and did a rough cut with the torch on the lower edge. I'll trim those down tomorrow.
-
1 pointMore progress. I repaired the body mount that was rotted. Cut out the rust and dropped a 1/8" plate in flush, then bored the opening. Then I made the plates to cover the cut out section on the bottom of the rails. You can see the plates sitting on the frame horns near the coil pockets. I forgot to get a pic of them tacked on. Flipped the frame back over after that and bolted it back down to the jig. You can see the plate on the bottom now. I also cut out all the funky shaped metal in the curve of the frame. Made a new piece to finish boxing the original rails back together before moving on to the plating. Started to stitch weld the press broke corner on permanetly. I fill the plug welds the rest of the way when I put the frame on its side. Didn't get the other side done but did manage to shape the filler piece to give me a head start on tomorrows work. Finished the other side tongiht. I moved on to the area before the arches and started plating over the hole left from removing the lower trailing arms mounts. I'll get the other side done tomorrow. You can see how there is a small section of the stock frame rail between the press broke section and the middle plate. I added the strip to tie the reinforcement plates together today. Now I'll do a plate that will cover all that up.
-
1 pointI've been busy this week with other stuff so not much to report. I did get the jigs made for the lower control arm mounts. Now I can cut the bracket off the frame for plating. I'll be doing custom mounts after it's all plated. These are now all drilled out to 3/4" and the nuts will locate the brackets. Hopefully I'll get the mounts removed this week and start cutting some plates. Well the custom axles finally came for the 9". No halfstepping with getting a 25 year old axle shortened and resplined it's all brand new shit for this ride. Using Ducthman because their process for making the axles doesn't harden them to a point that doesn't allow for needed deflection in our application. Another plus is they carry quality bearings not import crap. Went with a 5 on 5" bolt pattern with H.D. 5/8" studs for increased strength. The bolt I'm holding is the standard 1/2" thread of a stock stud just for comparison. I'll trim the studs after I get all the parts mocked up. The parts are stacking up, now I just need to find time to do something with all of them. I'm back on this since the snows flying now and I'd rather be in the garage. Removed the lower control arm mounts and smoothed the frame for plating. I also bored out the body mount holes for the sleaves I'll be welding in.
-
1 pointNo I didn't do that ride. I stick to the oldschool style of cars mainly. I've been slipping on the updates in here, I keep forgeting about this topic. I started working on the lower A arm mounts tonight. They need to be opened up to fit the large pivot joints I'm using. Other side done. Thats all for now. I've got another project to get done to help speed this along. I started building a frame hoist to allow me to flip the frame by myself to prevent being held up by not having help when I need it. I still need to make a cross bar to attach to the bumper mounts to lift from. Managed to finish the front lift bar and attachment/pivot point. It will rotate on the chain. I just welded a slug onto the pipe to keep the chain from sliding off. Now I just need to set the rear up tomorrow and get back on the frame.
-
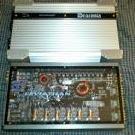
1 pointActually no. The 880 has 24bit Burr-brown D/A's The USB support is the same, you have to by the same adapter. Bluetooth support is the same, you have to by the same adapter. The only difference Ive seen is the copper chassis and a different faceplate. The 880 http://www.pioneerelectronics.com/PUSA/Pro...H-P880PRS?tab=B The 800 http://www.pioneerelectronics.com/PUSA/Pro...H-P800PRS?tab=B
-
-1 pointsin for epic build!!
-
-1 pointsShould have a group of 20 guys and their systems park in this guys front yard, and let em wang.
-
-1 pointsWtf was that all about? Sorry if you thought I was coming off like a dick Nick, I wasn't trying to at all man. My point was many of these "rules of thumb" are just wrong. And just like "How many Dbs" and "That woofer needs 4K watts to even work" get perpetuated into things that are just plain wrong and held as the gospel. I also never intended to have someone model an enclosure alignment, I suggested they look at vent velocity in thier chose alignemnt, which is the proper way to tackle that problem. You can do that easily with a program like WINisd... I guess I look at it this way, if they just want a rule of thumb answer, they should just be driected to the manufacturer's website and offered no additional help on this forum. It hey want help beyond that, I am going to give what I believe to be the correct answer. Again, I wasn't trying to be a dick. The clipping comment was a joke, BTW....